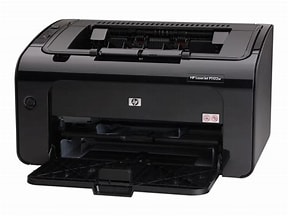
Windows 11 is the latest version of Microsoft’s operating system, and it offers a number of new features and improvements over previous versions. However, one of the most common problems that users experience when upgrading to Windows 11 is that their printer stops working.

If you’re having trouble getting your printer to work with Windows 11, don’t worry, you’re not alone. There are a few things you can try to fix the problem.
Step 1: Check if your printer is compatible with Windows 11
The first thing you need to do is check if your printer is compatible with Windows 11. You can do this by visiting the manufacturer’s website and checking their compatibility list.
If your printer is not compatible with Windows 11, you may need to update the printer’s drivers. You can download the latest drivers from the manufacturer’s website.
Step 2: Install the printer driver
If your printer is compatible with Windows 11, you need to install the printer driver. You can do this by following these steps:
- Go to Start > Settings > Devices > Printers & scanners.
- Click on the Add a printer or scanner button.
- Windows will search for printers that are connected to your computer. If your printer is not listed, click on the Add a printer that isn’t listed link.
- Follow the on-screen instructions to install the printer driver.
Step 3: Troubleshoot the printer connection
If you’ve installed the printer driver and your printer still isn’t working, you can try troubleshooting the printer connection. You can do this by following these steps:
- Go to Start > Settings > System > Troubleshoot.
- Click on the Printers option.
- Click on the Run the troubleshooter button.
The troubleshooter will automatically scan your computer for problems with your printer. If it finds any problems, it will try to fix them for you.
Step 4: Contact the printer manufacturer
If you’ve tried all of the above steps and your printer still isn’t working, you can contact the printer manufacturer for help. They may be able to provide you with additional troubleshooting tips or send you a new driver.
I hope this article helps you get your printer working with Windows 11. If you have any other questions, please feel free to leave a comment below.
Here are some additional tips for getting your printer to work with Windows 11:
- Make sure that your printer is turned on and connected to your computer.
- Make sure that the printer cable is properly plugged in.
- Try restarting your computer and your printer.
- Try uninstalling and reinstalling the printer driver.
- Contact the printer manufacturer for help.
In summary, while Windows 11 compatibility issues often cause printers to become difficult to use, there is an easy way to get your printer up and running on the new operating system. All it takes is a bit of technical know-how and the right set of instructions. Through following this step-by-step guide, you will be able to overcome any printer incompatibility issues with Windows 11. Being aware of the connection types and their availability will also help you when setting up your printer with the OS. Ultimately, while it may be intimidating to troubleshoot compatibility issues on your own, having control over the process can prove especially liberating. As long as you follow all of these steps in sequence, you are sure to get your printer going in no time!
